How to increase the volume of the violin and viola if it is too low?
Thanks to some clever engineering over the past few hundred years, stringed instruments have gotten pretty good at amplifying themselves. However, there are many reasons to combine this traditional expertise with the possibilities offered by modern technology. Maybe you play in a band and need help competing with a passionate drummer. Maybe you're interested in exploring new sounds you can create using electronic effects like reverb and distortion. Or are you interested in the possibilities of live looping? In this article we'll go from the absolute basics of amplifying a violin, viola, cello or double bass, to some of the most exciting opportunities that doing so offers.
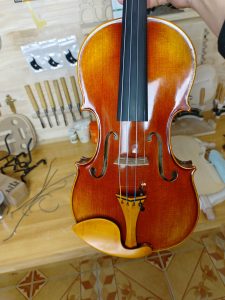
欢迎选购艺匠琴坊的弦乐器,您可以点击此链接与我们建立联系!
How does amplification work?
First, it's helpful to understand the basic principles of amplification. In the simplest case, a microphone receives sound waves and converts them into a small electrical signal. This small signal is then boosted by an amplifier, which uses electricity to convert these small electrical signals into a significantly more powerful sound that comes out of the speaker. The pickup is similar, except it picks up surface vibrations rather than sound waves – we’ll come back to that another time.
Electric or acoustic?
The first question many people have is whether to buy an electric instrument or stick with a traditional acoustic instrument and amplify it. There are pros and cons to both.
Because electroacoustic instruments have built-in pickups, they do not have to follow the rules of traditional acoustic instruments in construction. The fun, futuristic shape is certainly eye-catching, but the lack of an acoustic resonance chamber also has a more practical impact – it means these instruments make almost no sound unless plugged in and amplified.
This lack of immediate sound makes electric instruments perfect for quiet practice. Yamaha's silent violins and cellos, Presto and Hidersine ranges are all designed specifically for this purpose, with headphone jacks and built-in preamps, meaning you can just plug in headphones and make your playing your own.
However, the lack of immediate aural response, combined with the cost of purchasing an entire new instrument, means that many players choose to amplify their acoustic "traditional" instruments.
Pickup or microphone?
When amplifying an acoustic string instrument, you have two main options: a pickup or a microphone. Pickups work by measuring surface vibrations and are usually placed in or under the bridge of the instrument. Microphones measure sound waves rather than vibrations, which is a small but important difference. There are a variety of microphone options on the market, but when it comes to amplifying string instruments, there are several industry-standard models that we will focus on here.
There are many advantages to pickups. They're generally more affordable than microphones and can be used in more situations because there's a much lower likelihood of causing feedback (the harsh sound that occurs when a microphone starts to pick up amplified sound). However, because of the way they work, they will never be able to create a sound as "natural" as a microphone.
So you've decided on an electric instrument, pickup, or microphone. What to do next?
If you're buying an electric instrument, it probably has a 1/8" headphone jack and preamp, which means you can plug your headphones or speaker "aux" directly in and start playing. Otherwise, you'll need cables and an amplifier.
Most pickups and electric instruments only require a 1/4" "jack" wire. Prices vary depending on the length and quality of the cable, from single digits to hundreds of dollars, but you should be able to get it for around $20 Get a decent entry-level cable.
Microphones use a different cable with a three-pin connector called an XLR cable. The benefit of these cables is that they are "balanced," which means there is much less potential for electrical noise and interference. They are also just as widely available as 1/4 cables and about the same price. If you go this route, be aware that your microphone may require phantom power to operate – something like the DPA D:Vote 4099 does. This means you need to turn on the phantom power option on your amp or mixer. This is often labeled simply "48v" because this is the voltage the amplifier will send back through the XLR cable as DC to power your microphone, allowing the microphone to pick up more subtle sounds and power.
Next you need an amplifier. Again, there are tons of options here, but you can help narrow it down by thinking about how you envision your new electric gear. For home practice, a budget-friendly option like the Blackstar Fly 3 Acoustic Mini Amp costs $115. If you want more volume and flexibility, and the possibility of using an amplifier for performances, the Fishman Loudbox Mini is a favorite, striking a great balance between price, quality, and flexibility for around $600. Finally, if you're looking for a professional option, AER acoustic amplifiers are considered the best in the game, but expect to spend at least $1,200 to get them.
Let's start playing!
Before connecting your equipment, make sure the power is "off" and the amplifier's volume is turned all the way down to avoid "pops" and "clicks" that can damage speakers over time. Once you have everything hooked up, turn on the amp, check that the volume on your pickup or electric instrument is set roughly in the middle (if you have one), then gradually turn the amp up until you get where you want it to be volume. When you're done, make sure to turn off the volume and turn off your amp again before disconnecting all connections.
From here, the possibilities are endless. Chances are your amp already has some effects – try turning up the reverb or chorus and hear the difference it makes to your sound. If you're interested in more effects, your next step is to explore pedals that connect between your instrument and your amplifier.
Are you interested in looping instruments? Again, you can get a number of different pedals, with basic pedals starting at around $125 and pedals with options like quantization (slight tempo correction that makes everything fit neatly together) starting at $300.
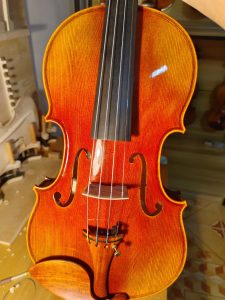
欢迎选购艺匠琴坊的弦乐器,您可以点击此链接与我们建立联系!
Another option when exploring effects, loops, and recording is to do it through your computer. To run your electric or amplified instrument through a computer, you'll need an audio interface such as the Scarlett 2i2 (about $200), which converts the signal from your pickups or microphone into a digital signal for use by the computer. Once you have these things, you can record directly into a free program like Garage Band on Mac, or Audacity on Windows.
For the next level, the Ableton Live program is designed for live use as well as being a full-featured digital audio workstation, and while the initial outlay may be more than a few pedalboards, the possibilities it offers are endless. As an example, consider violinist Todd Reynolds, who uses Ableton and a violin as the basis for his live performances.