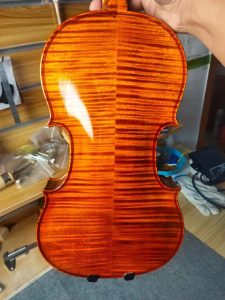
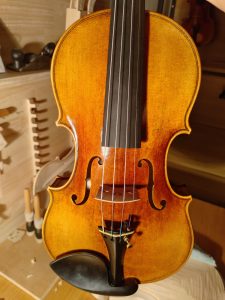
Beginner's Guide to How to Tune a Viola [Complete]
When you start learning to play the viola, your teacher will usually tune your viola during weekly lessons. If you're studying at home via the internet, or simply can't get anywhere to tune in, here's a little guide to help.
Why is my viola out of tune?
There are several reasons why your viola may be out of tune. But, don’t worry – it’s really normal for your viola to be out of tune – it’s part of everyday life.
欢迎选购艺匠琴坊的弦乐器,您可以点击此链接与我们建立联系!
If you have new strings installed on your instrument, they will take some time to stretch and settle. For most modern viola strings this is usually fairly quick, one to two days, but strings with synthetic cores or guts sometimes take one to two weeks to settle. If you want to speed up your stretching process, have fun while you practice! You just have to adjust more often.
Weather can have a huge impact on your strings and instrument. Even small changes in atmospheric pressure can do this. Humidity also changes, especially when the air is dry. For us in Brisbane, we see a lot of broken strings and even broken bows during late autumn and early winter when we're in a very dry period. Remember, a viola is made of wood. In fact, there is more than one type of wood. Wood expands and contracts with the weather, just like your front door can be sticky at times and may not even stay closed at times. Learn more about how a viola is made.
bumpy. If you accidentally knock or bang your instrument against your stand, you may need to re-tune your viola. You'll find the same thing if it's dropped or hit hard. Placing a viola in the trunk of a car can also create unhelpful jolts.
(Extra note: If your viola is bumped or dropped, sometimes the soundposts may move or fall. If dropped, loosen the strings immediately, do not pull the viola, and do not passgo - but do bring it to Reinstall it correctly as soon as possible at our MakersStudio or a nearby luthier. If this is not done, various damages may occur to the viola.)
Where do I start?
Your viola most likely has two sets of tuning mechanisms: the pegs at the top of the instrument and the fine tuners, or tuners, at the bottom as part of the tailpiece.
It is important to be very careful when tuning or installing strings. All strings, regardless of brand, are sold without a manufacturer's warranty. This is due to the number of variables that can cause a string to weaken, fall apart, or simply break. We've added some basic tips below to help prevent some possible causes of breakage.
We also need to pay attention to the bridge when tuning. Changing the tension of the strings up or down will also change the pressure on the bridge. Replacement is expensive and it will only stay in perfect condition for years if you maintain it properly while tuning it. More on that later.
欢迎选购艺匠琴坊的弦乐器,您可以点击此链接与我们建立联系!
violin part
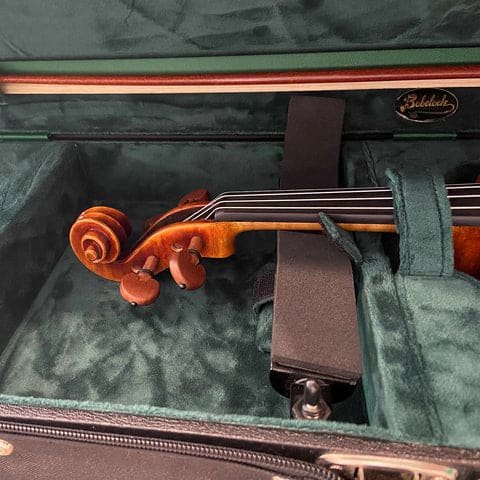
How to use your viola pegs
At the top of the instrument, the strings run up the fretboard, through the nut (a raised piece of ebony with grooves carved into it) and into the pegs in the peg box. Each string passes through a hole that corresponds to its respective peg and wraps around the peg as we tighten it. We turn each peg so that the strings come from above, not from below. Nails are tapered to fit holes in the nail box and are secured by carefully pushing them into place and wedging them with hand pressure.
Using tuning pegs can be a little difficult and tricky at first, but our top tip is to go slow and steady. It's easy to tighten the string too much if you tune it too fast, so you want to avoid tuning it too fast. Using the pegs slowly and gently will ensure that you don't cause any unnecessary damage to the strings or peg box. For these reasons, it is normal to only use pegs when the strings are too far out of tune for the fine tuner to correct.
How to use the spinner
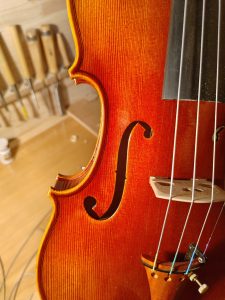
The bottom ends, or ball ends, of the strings run all the way down the fingerboard, over the bridge, and fit into the claws of the fine tuners (or string adjusters), which are mounted on top of the tailpiece.
The trimmer adjusts by simply turning a screw: clockwise tightening the strings raises (sharpens) the pitch; counterclockwise loosens the strings to lower (flatten) the pitch.
Using these screws for tuning is a safer option and is generally used for everyday tuning unless the pegs slip and your strings are too loose.
How to check if your viola is in tune
Ideally, you should bow a long, clear note; not too loud, as that will raise the pitch, but not too soft either. If you're tuning a child and don't know how to use a bow, just pluck the string halfway up the fretboard: again, don't go too hard or too light.
If you're musically trained, you can check notes with a piano, keyboard, tuning fork, pitch generator (often found on an electronic metronome) or even a pitch tube. Otherwise, checking the pitch is easy with a chromatic electronic tuner or a tuning app on your smartphone, tablet, or computer.
Using an electronic tuner or tuning app
Unless a particular string is very loose to begin with, we recommend starting with the A string and working your way through the D, G, and C strings.
An on-screen dial will show the pitch you just played. If you strum the A string and it's actually in tune, it will display a number letter A and the light will turn green (usually green).
If your string is a bit pointed (too high) it will be red or orange and will show some bars on the right. You need to turn the trimmer screw counterclockwise and strum the string again until the light turns green. But it still has to say the note is A.
If you're too sharp, it might think you're playing A# or even B; if you're too flat, it might say assume you're tuned to Ab or G. If a note is too far out of tune for the fine tuner to correct, we use a peg. You need to make sure you are using the correct tuning pegs.
First, loosen the bottom trimmer counterclockwise until it feels almost loose. Hold the peg firmly and turn it downward to loosen the string first. Sometimes the strings get stuck in the grooves of the nut or bridge, and tightening them immediately may cause them to break. That's why we recommend loosening it first.
Now gradually turn the peg to tighten it, stirring it frequently to make sure you don't overtighten it.
When you reach the approximate pitch or just below it, carefully push the peg into place so that it wedges in and doesn't slip out. You'll need a little pressure to make sure it stays in place, but be careful: the sides of the viola pegs are relatively thin. While you need to push the hook firmly in to secure it, don't be too rough. Check the tuning again and use the fine tuner to bring the notes to the exact pitch according to your electronic tuner. Perform the following steps for each string.
If you know how to do it and have a well-trained ear, your final tuning check should be to compare fifths: A&D, then D&G, then G&C.
NOTE: If your viola is very out of tune to begin with, you may need to repeat the entire process two or three times. This is because your strings may stretch and settle, and larger changes can create additional twist in the bridge. Which brings us to the importance of checking your bridge during the tuning process!
Shop our range of metronomes and tuners and get fast delivery Australia wide.
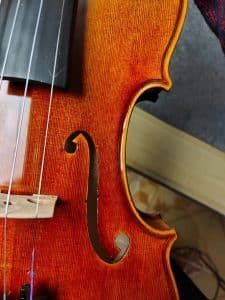
Check your bridges
Check your bridges
Tuning changes the balance of string tension at the bridge. The bridge can develop an unhealthy curve or warp, usually toward the fretboard, but sometimes back toward the tailpiece. Sometimes they even get twisted out of shape!
During and after tuning you should first check that the feet of the bridge remain flush and lie correctly against the belly of the viola, and then make sure that the top of the bridge is not bent while you are tuning. If it starts to move, you can try straightening it with your thumb on one side and fingers on the other. Be careful not to flip the bridge over!
If you have any questions about this, please don't proceed: call, email, ask for advice on Facebook or bring us your viola and we'll help you. We'll also show you how to adjust and inspect your bridge safely at home.
protect strings
Always keep your strings clean. They will last longer and perform better. Usually, all you need to do is wipe them down with a stiff but soft cloth after playing. If there's a lot of rosin buildup, you can use isopropyl alcohol on the worst spots, but don't let it come into contact with the varnish on the viola body. (If you play gut strings, don't use alcohol.)
If you have a small string guard on your A or D string, make sure the guard sits neatly in the bridge groove. They serve three purposes: to protect the strings from being damaged by dragging across the bridge; to prevent these very thin strings from cutting into the wooden bridge, and the A strings are designed to help reduce the chance of an unpleasant whistling sound.
Make sure you don't touch the strings on anything - like your music stand. We often see small dents in the strings from this bump. These strings will eventually unravel and break.
Cut your nails often. Fingernails can damage the strings. You need short nails to play a stringed instrument.
If you get a chance to check it (because the strings are getting too loose), look at the nut and bridge grooves. They may already be lined with graphite, but it won't hurt if you use a soft pencil (2B or softer) to score the grooves before replacing the strings. This helps lubricate the grooves, protect the strings from additional resistance, and protect the wood from string damage.
some extra tips
If the trimmer screws are hard, remove them one at a time, clean and lubricate them with a little WD40 or similar product. Just make sure not to spray any WD40 near the viola.
If the nails slide too often or are difficult to adjust (such as making a clicking sound or sticking too hard), you may need to wipe them clean and apply some nail paste. Nail paste smoothes the surface of the nails and helps prevent them from sticking. If you find that the peg compound isn't working, we recommend having your pegs checked by a luthier - they may need to be replaced so you can have a set of pegs that fit your instrument perfectly.
Keep the strings and viola body clean. If properly maintained, strings last longer and sound better. If the body has accumulated too much rosin and dirt, your annual service will cost more because it will take longer to complete. It needs to be simply wiped with a soft cloth after daily use.
It's best to use a good quality viola polish to complement the wood, especially the front of the instrument. The top is made of spruce and can crack if it dries out too much, which is why we see far more instruments with cracks on the front than on the back. Protect your investment by giving your viola some TLC every month.
Shop our range of instrument care and cleaning accessories.
If you have a beginner model viola, have you upgraded the strings? Did you know that strings can make a huge difference in timbre, the response of the viola to your bow, and dynamic range? By installing better strings, your entire learning journey can become more satisfying. Beginner models usually have very basic steel strings supplied from the factory. If you upgrade your strings through us, we're always happy to install them for you free of charge.
Learn more about improving the sound of your instrument.
We hope this information helps you tune your viola! If you have any further questions, we'd love to hear from you.