How is a handmade violin made? The whole production process
handmade violinThe production process is very complicated and there are optionsviolin woodIt consists of more than a dozen processes, including paneling, cutting contours, scraping boards, making side panels, harmonizing the piano, painting, and assembling. The production process of a purely handmade violin is almost exactly the same as that made in Cremona, Italy 200 years ago. Let us witness the birth of the "Queen of Instruments" violin.
欢迎选购艺匠琴坊的弦乐器,您可以点击此链接与我们建立联系!
Get the dimensions of the violin
So let’s decide which violin mold to make first? Just choose Guarneri from 1735!
The dimensions of this violin are as follows:
Rear 350mm
Upper part (top round head) 164mm
Middle 109mm
Lower part 205mm
Arch height (longitudinal): 15mm
Arch height (lateral): 14.4 mm
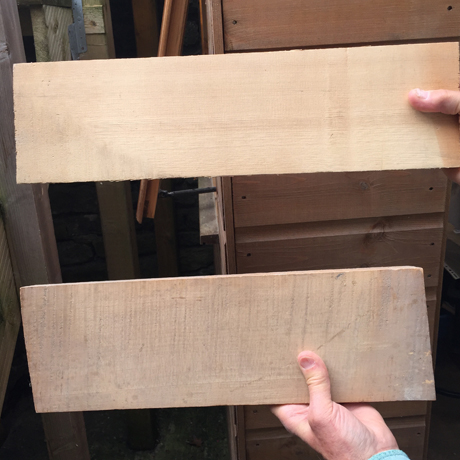
Then start choosing woods like maple and spruce
The best woods to use for the bass, back, and sides are Balkan maple—because it’s both dense and light—and spruce for the front (or belly).
For luthiers out there, old English makers often used pear or cherry wood because they couldn't always find maple. Cherry wood is also relatively abundant in the United States.
Give yourself the tools. Here's a basic checklist of what you'll need:
Tool list chisel and
Chisel scraper and dried horsetail
(also called horsetail) as a fine abrasive
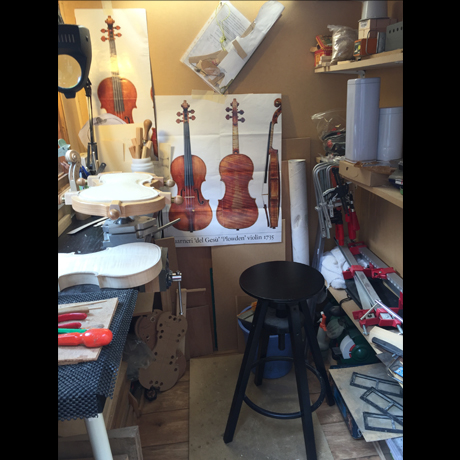
This is Alastair's miniatureviolin making studio, showing off some of his tools:
Make the outer arc of your violin (you can make the arc card yourself or buy it on Taobao)
Make your violin template out of card and plywood, or use a longer ruler.
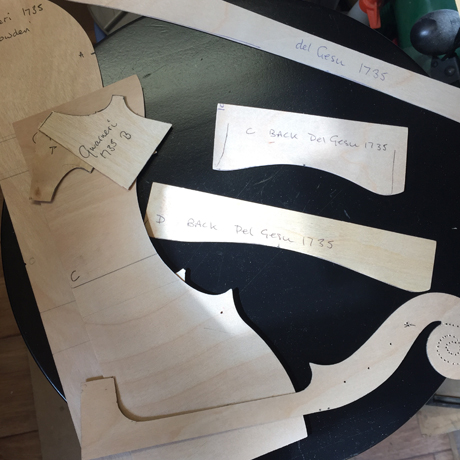
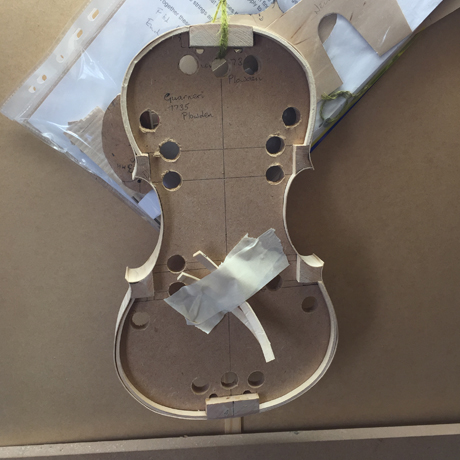
Make a violin mold from plywood
Use your template to create a mold that will be used to shape the instrument's ribs and the front and back of the instrument.
Put in the corner and end pieces – these are made from willow and keep the angles of the side panels vertical.
For the lining (i.e. the thin strips of wood inside the side panels) use lime.
Wipe the edges of the molds with a candle so the side panels don't stick to them when you remove them from the molds.
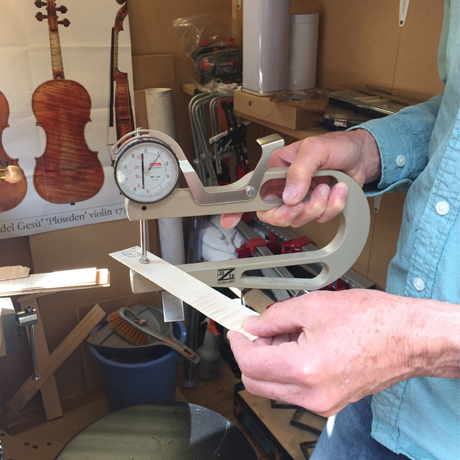
Thickness of side panels
Use a thickness caliper to ensure that the wood you use for the side panels is of the same thickness - generally 1.2mm, anything more than 0.1mm will not bend with a soldering iron.
Bend the side plates on the soldering iron
as the picture shows:

Fix the shape of the violin
Next, you'll want to use your side panels as a template to draw the outline of the violin with a metal scribe. Use a pencil to go around the outline with a shim, creating a 2 mm distance between the side panels and the edge of the violin.
Then cut off the back of the violin with a handsaw and file it flat.
Mark the 4mm thickness on the edges of the pieces of wood used for the front and rear panels and instruments.
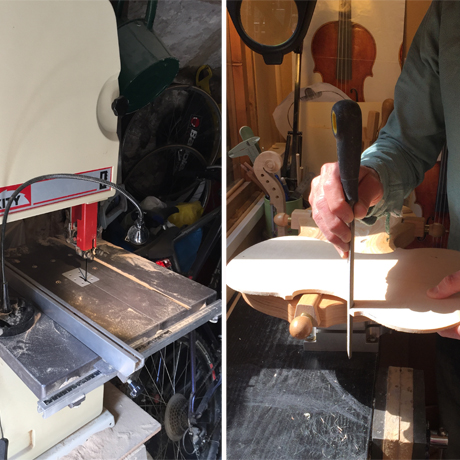
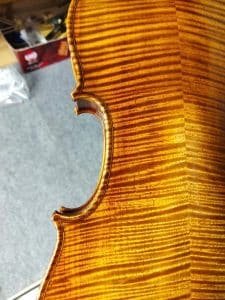
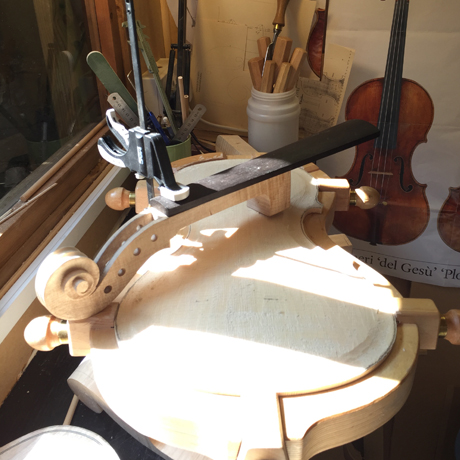
Then use a chisel to shape the outer curvature of the back panel
To get that lovely rounded shape on the outside of the outer curvature of the violin back, you'll need to use a chisel (no bending here!). The 80% wood blocks will eventually become waste.
Then sculpt to create your desired shape. You can use five arch templates called radian cards (pictured below) to ensure you get the shape you want.
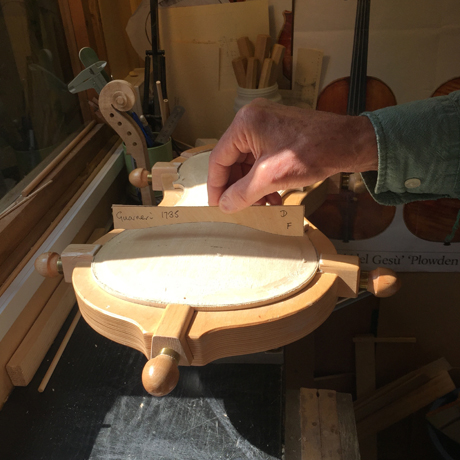
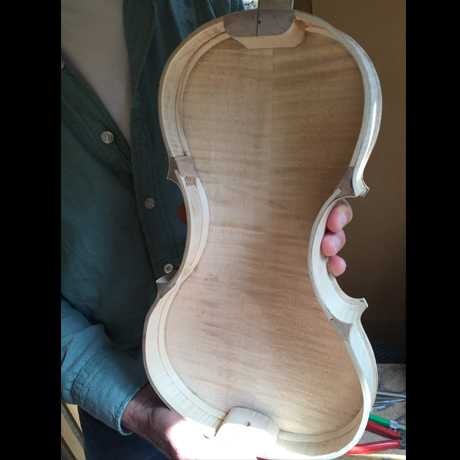
Place the strips inside the side panels and glue the back
After finishing, you need to check whether the edges on the back are even.
欢迎选购艺匠琴坊的弦乐器,您可以点击此链接与我们建立联系!
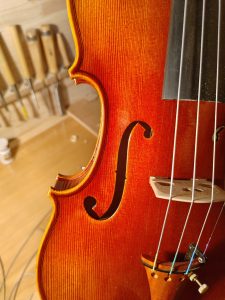
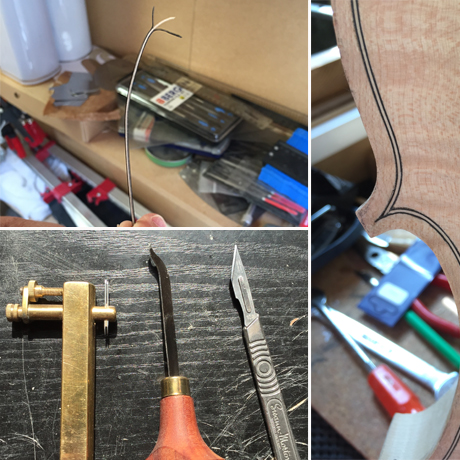
Now comes the inlaid black line (this is the decoration on the edge of the violin)
Traditionally, the maker used pear wood and ebony - but he used fiber because it was easier to work and would not crack when bent).
Mark your pieces of wood with edge markers (shown on the far left in the photo below).
Use these lines as a guide and then cut out a channel with a scalpel (try not to cut your fingers!) until you have a channel deep enough (about 2mm) to go around with the selvedge cutters (the middle of the three) Use the tool as shown below).
Miter corners into stings (see picture – Stradivari was particularly good at this)
Fill the channel with hot glue and push your trim in (already cut to size).
take out your mold
It's nerve-wracking. Using a knife, gently crack the mold open. If you used a candle wax tip (above), the ribs should not stick to the mold.
Repeat all this for the previous
So that's everything from cutting the wood to gluing it to the ribs. If you use a softwood like spruce, the process of working the front panel will be much faster since it is easier to work with than maple.
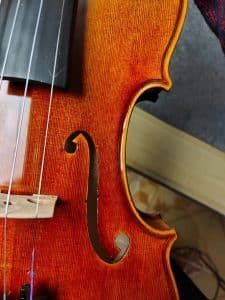
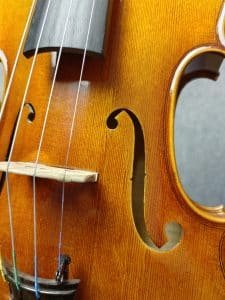
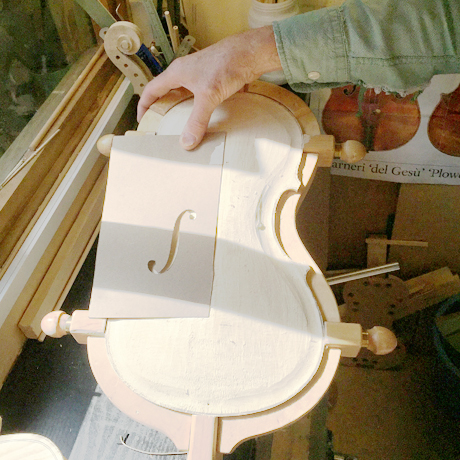
Carve your F-hole
The F-hole essentially allows the sound to escape from the violin's cabinet. They are also one of the violin's most attractive features. The f-holes on most violins are asymmetrical (even on Stradivarius instruments).
Use a compass and the measurements from the model to measure where you want the f-hole to be.
Cut four holes (at each end of the two f-holes). Use the template to connect the top hole to the bottom hole - as shown below.
Next, you need to attach the bass bar.
The bass beam is almost as long as the violin and is located directly under the G string of the instrument. It strengthens the violin and adds depth to the sound.
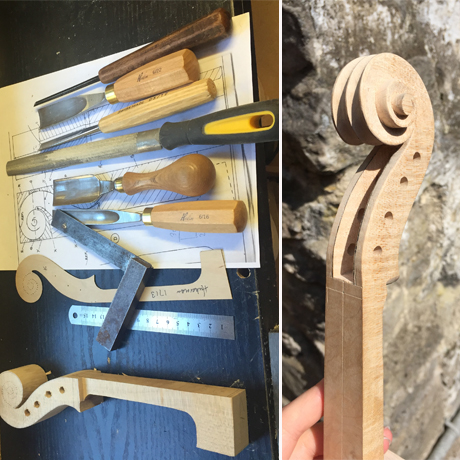
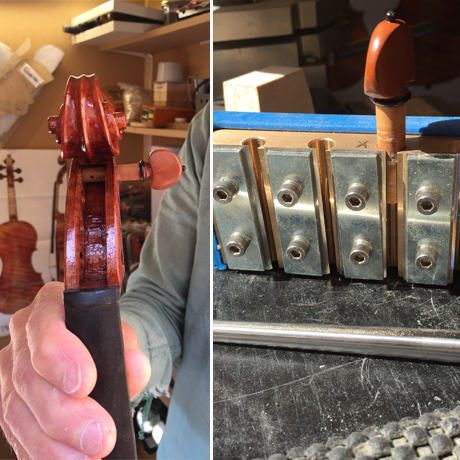
Make the pegs and neck
Using the template, use pinholes to create the outline of the scroll shape.
Then drill nail holes into the scroll.
Now, use a saw to cut out the pegs. Then use a chisel to carve your pegs.
This is the only true free engraving when making a violin - so the caliber of the scroll is a good indication of the maker's ability. No pressure.
Thicken the violin's fretboard and glue it to the neck
This is made from ebony, which is a very dense hardwood. Allow plenty of time for this…
The neck is then attached to the violin body using a mortise and tenon joint. Glue it in.
Cut and install knobs
The tool for doing this is somewhat like a pencil sharpener. You can combine this with a tapered reamer – both are shown below.
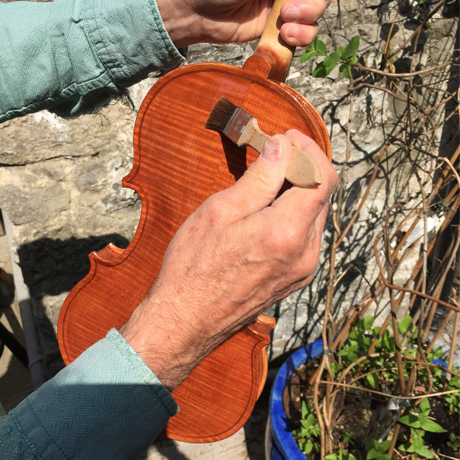
Ready for paint
Preparing the wood and using yellow ground - Alastair used linseed oil and Venetian turpentine. The most important thing is to use a coat of varnish containing dragon's blood, a bright red resin from the tree.
Depending on the depth of color you want to achieve, you will need about 15 paint passes in total.
Then put your violin outside, if it's sunny. Or put it in a UV box so the color will get darker.
Done!
The above is the whole process of making this violin. Although it does not seem difficult, it is very difficult to make each one perfect. I pay tribute to every violin maker and hope to make better violins!
欢迎选购艺匠琴坊的弦乐器,您可以点击此链接与我们建立联系!